

How To Build A Circular Face Brick Fire Pit
![]()
![]()
![]()
![]()
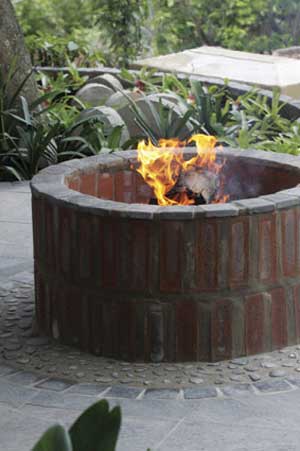 Image: www.thegardener.co.za If you’ve never worked with bricks before, then the idea of building a circular face brick fire pit may seem a little daunting. But with a few basic tools and a step-by-step guide from our friends at Corobrik, you’ll be amazed by how simple it really is. So get out your trusty toolkit, put on some old clothes and get ready to build your own face brick fire pit!
Corobrik’s Guide To Building A Face Brick Fire Pit Before you begin, you’ll need to make sure you have the following tools and materials: Face Brick Fire Pit Materials
- 1 bag PPC Cement
- 2 bags building sand
- 2 bags river sand
- 2 metres reinforcing wire
- 64 face bricks
- 24 cobbles
Tools Required
- Bricklaying trowel
- Float
- Builders’ line
- A tin of spray paint
- Spirit level
- Rubber mallet
- Hammer
- Stake
- Spade
- Wheel barrow
Step One:
Hammer the stake into the ground to mark the centre of your brick fire pit.
Building Tip:
When choosing a spot for your brick fire pit, make sure you pick a flat level area that’s roughly 8 metres away from a building or tree.
Step Two:
You will need the builders line and tin of spray paint to create a circle with a 800mm diameter. Tie one end of the builders’ line to the spray paint tin and the other end to the stake. Hold the line taught while you walk around the stake to outline the edges of your face brick fire pit in spray paint. ![]()
![]()
![]()
![]()
 Image: www.diynetwork.com
Step Three:
Now dig out the soil within this circle until you reach a depth of 15 centimetres. ![]()
![]()
![]()
![]()
 Image: www.planitdiy.com
Step Four:
Mix concrete with water until this mix reaches a peanut butter-like consistency. Fill the hole with this wet concrete and flatten the surface with your trowel to form the face brick fire pit foundation. Leave this to dry for 24 hours. ![]()
![]()
![]()
![]()
 Image: www.lowes.com
Step Five:
Once the foundation has set, you can begin making the mortar. Mix 4 parts building sand and 1 part PPC cement and water. Cover the foundation with a 2cm-thick layer of mortar. Begin setting your first level of 32 face bricks in an upright position while your mortar is still wet, and line the bricks up along the edge of the foundation to form a circle. Make sure that the inside edges of the bricks are almost touching, and that the gaps between the outside edges are slightly wider. Tap the bricks in place with the mallet to make sure they are firmly set into the mortar. Then place the spirit level over each brick to ensure that the first level is even. Lastly, fill in the gaps between the bricks with mortar to secure them. ![]()
![]()
![]()
![]()
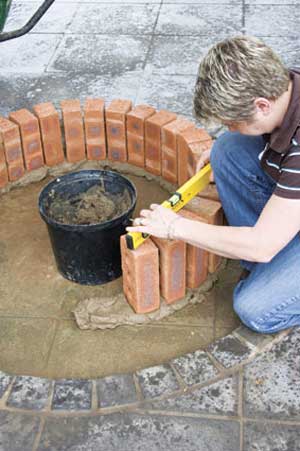 Image: www.thegardener.co.za
Step Six:
Cover the top of the first level of face bricks in a 1 centimetre layer of mortar, then fix the reinforcing wire into this before laying the second level of upright bricks. Don’t forget to ensure that your second level is even and that the gaps between the bricks are filled with mortar. ![]()
![]()
![]()
![]()
 Image: www.thegardener.co.za
Step Seven:
Cover the top of the last level of bricks in a 1 centimetre layer of mortar and set your cobbles on top of this to finish off your face brick fire pit wall, then leave the mortar to dry for 24 hours. ![]()
![]()
![]()
![]()
 Image: www.thegardener.co.za And that’s really all there is to it! Pretty easy right? Now that you’ve read through all the instructions, we hope you’re ready to start building, and that you’re looking forward to many fun-filled evenings spent around your face brick fire pit. Looking for quality face bricks to build your fire pit?
Visit Corobrik to view their wide and versatile range.


You might also like...
-
Why Powering Klay with the Sun Makes Sense

For centuries, clay bricks have been shaped by the elements—earth, water, air, and fire. Now Klay is embracing a fifth force: the sun. As a ...
-
Eva-Last: Wow-Factor Renovation Tips and Tricks For Your Outdoor Space

With summer holidays just around the corner, it’s the perfect time to start planning your dream outdoor space for the festive season. The design ...
-
Clay Brick

A popular choice among property owners and developers, clay bricks are not only a budget-efficient and durable option when it comes to building material, ...
-
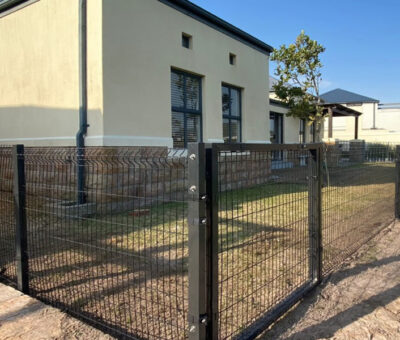
Easy View: Proudly South African DIY Fencing for a Stylish and Secure Home

If you’re searching for high-quality DIY fence panels that can withstand South African conditions with ease, Betafence’s EasyView range is your ideal solution. This DIY fencing option is not ...


Visit SA Decor & Design on social media


